Please read the instructions carefully prior to installing your Tile Easy Tiles.
Your warranty will be voided if any of these guidelines are not followed.
The Tile Easy flooring system must be installed over a structurally sound floor that is:
To determine if a floor is suitable, use a straight edge to identify the high and low areas. The high spots (if on a wooden floor) need to be planed and low areas need to be filled with non-cracking good quality filler.
Be sure tabs are fully interlocked. When installing the Tile Easy flooring system, listen for a “click” sound to ensure the tiles are fully engaged.
It is also important to visually examine the tabs to make certain there is a complete connection.
Use only with Tile Easy – flooring system K- grout products. Other grouts are not sufficiently flexible to handle the movement associated with a floating floor and will fail.
The tools Indicated on this page are helpful for a Tile Easy – flooring system installations, but, not every tool listed is necessary. Always follow the tool manufacturer's safety requirements and keep appropriate safety guards in place.

Remove existing carpeting, underlay or quarter round mouldings. Do not remove existing resilient floor covering if flat, smooth and in good condition. Please refer to recommended work practices for removal of any flooring

Identify high and low spots that are out of tolerance. High spots should be planed, and low spots should be filled. When levelling subfloor, only use high quality product (such as Ardex products).

Inspect floor for movement. If movement is caused by loose boards or existing flooring surfaces, secure them. If movement is caused by deflection, consult a builder for structural repair.

Check all door and appliance clearances as well as transition heights.

Cut or plane the bottom of doors to accommodate change in floor height. A tile with tray has a height of 15mm.

Undercut door casings and jambs. This will allow tiles to move freely while also covering the cut edges. A scrap piece of tile can be used to guide the saw blade. This will help achieve the correct height for undercutting.

Sub-floor must be clean, smooth, dry, and structurally sound.
Temperature during installation should be maintained above 5° C (60° F) and below 43°C (110° F).

All claims for defective product must be filed before the tile is installed. A careful twisting and visual inspection should be performed prior to installation.

Small cut pieces (under 100mm) installed along the perimeter should be avoided, see layout advice above. If it is unavoidable, adhered small pieces under 100mm around perimeter using a premium construction adhesive

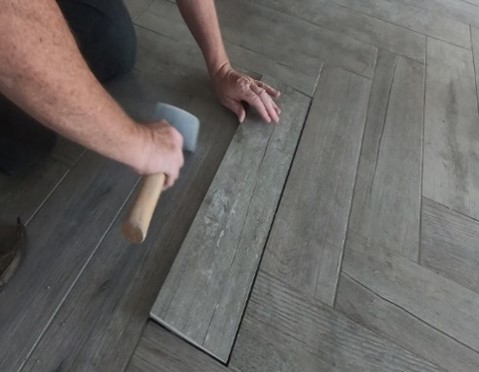
Tiles can be interlocked using a white rubber mallet and tapping block. Using a tapping block is optional.
Tiles may be installed one at a time, or in rows.

System is non-directional, and can be installed to the right or to the left.
A tile cannot be installed between two other tiles.


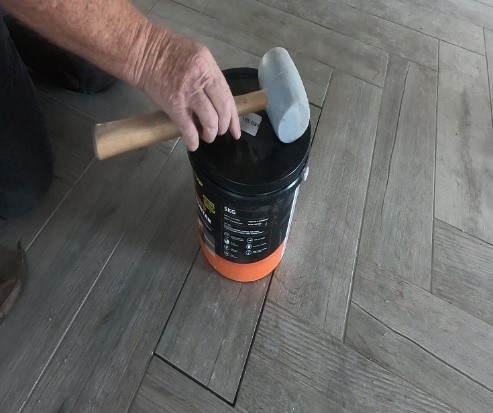
Ensure interlocking tabs are fully engaged. Grout joint intersections should form a perfect cross.
This should be checked throughout the installation, and after the field tile has been installed. Adjustments can be made by using a white-headed rubber mallet and tapping the misaligned row in the appropriate direction.
Tile rows can be shifted for perfect alignment using a rubber mallet and pull bar, or tapping block.
Tiles can be disengaged in 2 ways:
Tile Easy Tiles installs in straight, diagonal, staggered, or mixed size patterns.
For the best visual results, the installation should begin in the centre of the room. As with a traditional tile installation, the layout should be planned so the cut pieces along the perimeter appear in an aesthetically pleasing manner:


If your cut pieces along the perimeter is under 100mm, then find the centre of your first tile and use that line as your starting line point in the centre of your room. This will increase your perimeter tile size by half the size of your first tile.


When beginning an installation along a wall, (not preferred) remove the tabs to allow for the 5mm expansion gap and use 5mm spacers. To be removed when grouting. Tabs can be removed using snips.
Due to the shade variation associated with glazed porcelain tile, tiles should be mixed from cartons if installing different lot number. We recommend all jobs be installed from the same lot number.
Always follow tool manufacturer safety requirements and use appropriate eye and ear protection.
Tiles may be cut using a wet saw, or angle grinder, all with a diamond blade.
A 5mm gap is required along the perimeter to allow for expansion and contraction.
When marking cuts:
Step 1: Measure distance between wall and the field tile, then deduct 8mm .This factors in 3mm for the grout joint plus 5mm for the expansion gap.
Step 2: Mark the measurement on a tile, and proceed with the cut.

When using a wet saw, be sure to change the water often. Shavings from the plastic tray float, may clog the water pump.
After cutting the tile with a wet saw, set it with the cut edge facing down to allow the water to drain properly
When cutting tile use a cutter with a diamond blade, use an Angle Grinder or similar.

Step 1: Mark tile with pencil.

Step 2: Cut tile with saw.
- L cuts, Curved, circular, or U cuts can be made using an angle grinder.
- Holes can be drilled using a high quality carbide-designed hole cutter or diamond bit.
- Once cut, a tile can be installed along the perimeter using a rubber-coated pull bar.
Surface Preparation
Conduct a final floor inspection, verifying:

(a) all tabs are fully engaged.

(b) all grout intersections are properly aligned, forming a grout line

(c) joints are clean, dry, and free from debris
There are 2 grouting systems you can use with Tile Easy Flooring;
1. Tile Easy - Strip Grout
2. Tile Easy - Grout
Using Tile Easy - grout systems are a critical part of installation.
*** Using other grouts will make warranties invalid.
Tile Easy – grout systems may be applied as soon as you have finished installing your floor.
No messy wet grout, no water, no clean up afterwards and 100% sealed.
Steps:
1. Starting at one end of longest joint line, push strip grout into joint pressing down hard with roller making sure the strip has been pushed to the bottom of the joint and has a good interference fit. (hard to pull out)
2. With cutting blade shear off the top of the strip that is protruding, cut it level with the surface of tile.
3. Insert all the longest joint lines first in the one direction.
4. Then starting with all the joints running at right angles, insert the strip grout following the same procedures as before.
5. When you come to a crossroads, use a sharp blade and notch the strip in line with the tile's edge to allow a perpendicular strip of grout to pass through (see diagram below)
6. Before continuing with inserting grout strip, drop a dob of silicone (supplied) at the joint crossroads.
7. Continue to insert all grout joints running at right angles the same way and shear of using the same process with a blade.
8. If your layout pattern of tiles are in a brick bond pattern, insert the strip grout in all longest grout lines first and then cut short individual strip pieces to fit. Make sure to use silicone dobs at both ends before inserting.
9. Around the perimeter of the tile installation using a good quality colour silicone chalk to seal


No hours on your knees, no buckets of water, no sponges, no clean up required afterwards.
The Tile Easy - Grout comes in dual cartridges with static mixing nozzle.
To save on Tile Easy - Grout costs, its best to use Tile Easy Rod Grout saver first, ask you retailor for more details
Steps:
The first step is to remove the grout on all 4 sides of the tile. This procedure can be carried using a sharp knife but being careful not to damage the other remaining tiles.
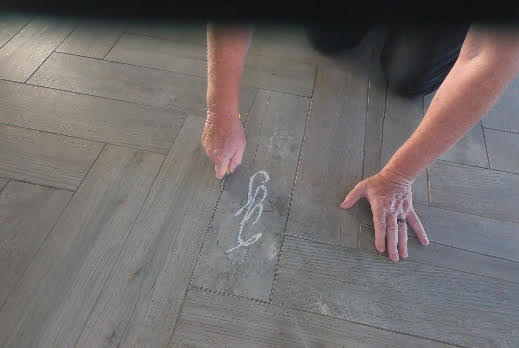
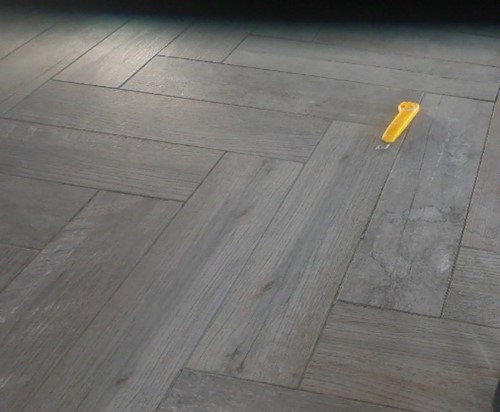
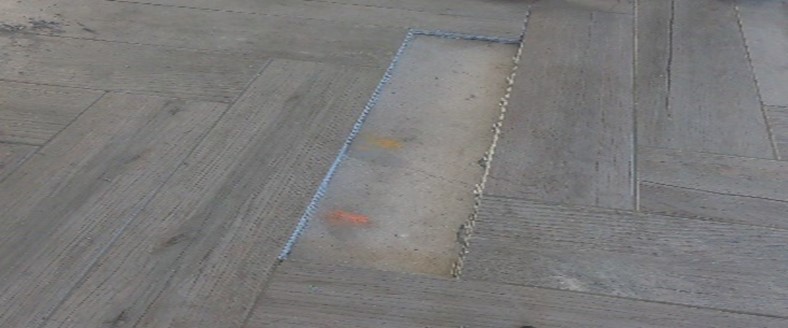
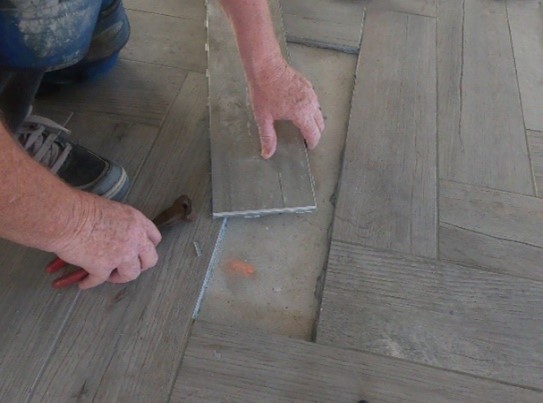
When removal of the grout is finished and again using a sharp knife, cut the interlocking tabs on 3 sides only of the tile to be replaced. (see Pic 3 ) Once the tabs are cut lift the edge of the tile and unclick the tabs that are remaining
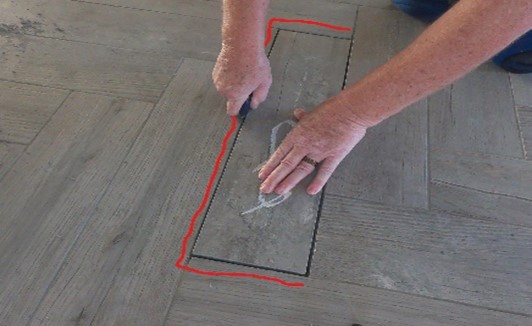
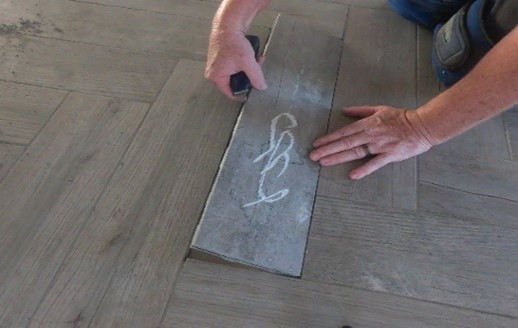
Clean all the edges of existing tiles before installing new tile
You are now ready to install the new tile. Cut the plastic tabs off 3 sides of the new tile to be installed, snips are ideal to use for this procedure. Flip the tile over and apply some construction adhesive on the back.
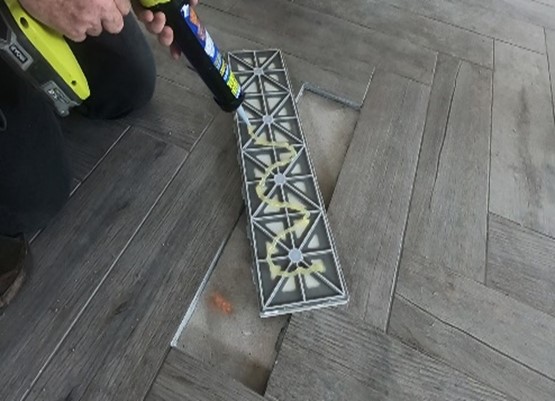
Insert the tile by clicking the edge with tabs on, into the existing tile, using a rubber mallet tap it home securely.
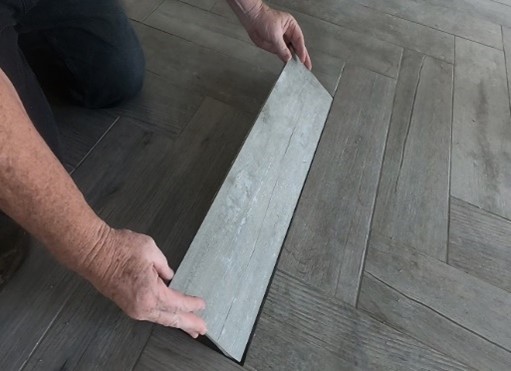
Put a weight on the replacement tile until construction adhesive dries, grout as normal and wait until grout dries before walking on
Finished